
Since I have two doors, I wanted to do something different and not make two of the exact same wreath. So I decided on doing one wreath in the stars part of the flag and one on the stripes.
Supplies you will need:
2 straw wreaths (I used 18 in wreaths because my doors are big)
2.5 yards of navy burlap ( I couldn't find this in any store, I bought it online here)
1.25 yards of red burlap
1.25 yards of off white burlap(the color I got was called "oyster")
Sharpie
Circle Pattern (I used a coffee mug to trace the circles)
Scissors
Ball Point Pins
Paper Mache Stars (I used 6)
White Paint (spray paint or acrylic)
Distress Ink (optional)
Floral Wire
Vacuum (you will see why later)
Step 1: Trace your circles on the red, white, and blue burlap and cut them out. Or if you are like me you will trace, some, cut some, pin some, and repeat. Put on a good movie or tv show because this is very time consuming.

TIP: How much fabric it will take you will depend on how big your wreath is and how tightly you place them on your wreath.
Step 2: Once you have all the circles cut out, you will fold the circle in half, then in half again.


TIP: Using a straw wreath instead of a styrafoam wreath will save you money. I bought two 18 inch straw wreaths for 8 dollars where I would have paid 8 dollars for one styrafoam wreath.
Step 3: Pin it to your wreath.

I alternated between three rows of red and three rows of white.
TIP: Make sure you use ball point pins.

These dressmaker pins will go through the holes in the burlap making it fall apart easier. I speak from experience, I used them on the red and white striped wreath and several pieces have come off.

I didn't take a picture of the navy wreath but you make it the same way. It is easier though because it is all one color.
Step 4: Paint your stars white.
I got mine at Hobby Lobby near the wood section for 50 cents.


Step 5: This is completely optional but I wanted more of a distressed look so I added some distress ink on the edges.


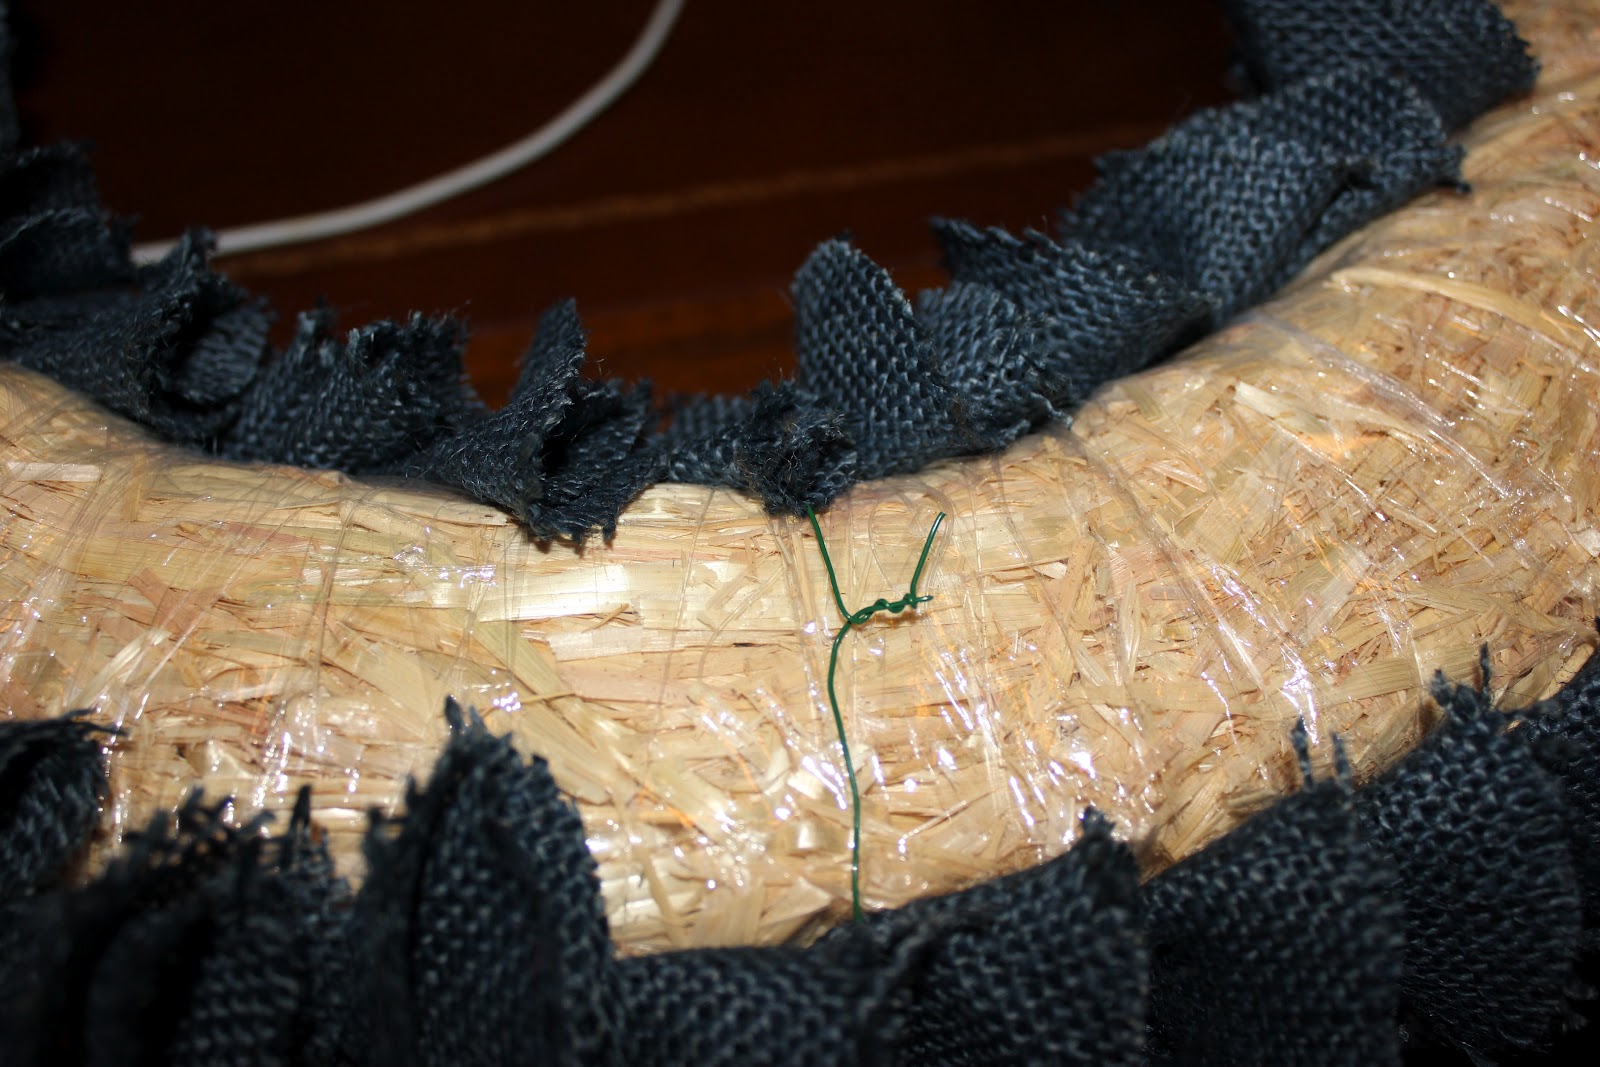
Step 6: Cut the strings off the top and poke two holes about one inch apart in the back (making sure not to poke through the front) and string a 12 inch piece of floral wire in one hole and out the other.


Step 7: Place the star where you want it on your wreath and flip the wreath over to the back and twist the wire like you would a twist tie. The wire will be hidden in the front between the fabric.
TIP: I put a piece of tape over each piece of wire in the back so it won't scratch my door.
Step 8: Vacuum up your mess and trust me burlap sheds and make one hot mess. I had already vacuumed once in the middle of the process.

Step 9: Hang your wreath and admire its beauty.

I plan on leaving these babies up all summer long. Since all the holidays in the summer are patriotic I think it is acceptable...Memorial Day, Flag Day, Fourth of July, Labor Day, and September 11th.
If you have any questions or want me to explain something better, please leave me a comment or email me at lifewithbothhandsfull@hotmail.com and I will get back to you ASAP.

Cute! I like the idea of keeping the same wreath all summer long. These turned out great.
ReplyDeleteI love these ... I never would have thought to make 2 separate wreaths!
ReplyDeleteHeck yeah! Keep those babies up there all summer. They look great! I love the burlap in the different colors. Great job.
ReplyDeleteGreat job!
ReplyDeleteSweet projects - two wreaths are always better than one :)
ReplyDeleteJoAnn
Wow, the patience it took to pull those off but so worth it! I love them. I love patriotic decor but they can look cheesy it is nice to see a classy alternative! Good job.
ReplyDeleteOh, I LOVE the two wreaths! You normally see two wreaths that are the same on double doors. I love the fact that they're different =)
ReplyDeleteVisiting from Somewhat Simple
Cute! So summer festive!
ReplyDeleteLove these wreaths and the great tutorial too. I found your blog through Somewhat Simple blog party and I would love to invite you to share this, and any other posts, at my Creative Thursday Link Party (open through Monday each week) at www.michellestastycreations.blogspot.com. Have a wonderful weekend.
ReplyDeleteMichelle
So great! I love all the fun red, white and blue projects starting to pop up in blogland. I hope you will link up to my Patriotic Project Parade.
ReplyDeletehttp://www.itsybitsypaperblog.com/2012/06/patriotic-project-parade-linky-party.html
The 2 separate wreaths are so cute!! What a great idea. We are so happy to have you join us for our "Strut Your Stuff Saturday". Please come back soon!! -The Sisters
ReplyDeleteThis is so clever! I think it's fabulous. I would leave it all summer too. This is a big WOW!
ReplyDeleteThose look fabulous! I love wreaths and I love the 4th so perfect match! Can't believe you cut out all those circles! Great project!
ReplyDeleteLove the title of your blog and how you made both wreaths. Looks great on your door! I'm a new follower, feel free to follow back to check out my blog at I Heart Pears
ReplyDeleteWow! Those look great! Thanks for sharing!
ReplyDelete--Katie
@ Creatively Living
This paragraph is really a fastidious one it assists
ReplyDeletenew web visitors, who are wishing for blogging.
my webpage; binoa review
Hello to all, how is everything, I think every one is getting more from this website, and
ReplyDeleteyour views are nice designed for new people.
My webpage ... www.ngoma.cd
What kind of pen did you use to trace the circles? Did the pen run on the burlap? I am afraid that it will on the white color. Also, did you wash your burlap before cutting? Thanks in advance....I am a novice crafter and going to attempt this.
ReplyDeleteHi Krista!
ReplyDeleteI love the way these wreaths turned out, and that one is blue and the other is red and white! How smart!
I'd love to pin this to The Home Depot Wreaths pinterest board if you don't mind!
Cheers,
Caroline
Senior Editor, homedepot.com
jordan shoes
ReplyDeletehermes belts for men
nike air max 95
curry 6 shoes
nike air max 2018
michael kors
supreme hoodie
air max 95
nike sneakers
coach outlet
온라인카지노
ReplyDeleteIf you ever see a beautiful post, it is important to praise it and I am doing the same, in fact, your post is very beautiful, the content written in it is good.
Your blog posts are more interesting and impressive. I think there are many people like and visit it regularly, including me. I actually appreciate your own position and I will be sure to come back here 카지노
ReplyDeleteValuable info. Fortunate me I discovered your web site by chance. 토토사이트
ReplyDeletehfsfd782gz
ReplyDeletegolden goose outlet
golden goose outlet
golden goose outlet
golden goose outlet
supreme outlet
golden goose outlet
golden goose outlet
golden goose outlet
golden goose outlet
golden goose outlet