Showing posts with label silhouette. Show all posts

Wednesday, March 14, 2012

Springtime Decor

Remember the day I flooded my kitchen?
 Well as if that wasn't enough to do in one day but I also thought that would be a great day to put out my spring decor. It was a great idea too because spring and all it's bright and cheery colors put me in a happy mood.


Want to hear the best part about my spring decor?
The only thing I bought was that big bunny and I bought him before Valentine's so I don't count that ;)
I got him at Home Goods for 12 dollars and I already had the eggs from my kids easter baskets. Doesn't it look like a jar of huge jelly beans?
I spray painted a old plate my Mom had given me and used my Silhouette to put a "Spring Chicken" on it. 
Since these tissue rosettes from The Idea Room took me so long to make for Valentine's, I decided I would use them with my spring decor too. I just painted a candlestick I had green and added it to the top. I think it looks like a flower.

This tea set is very special to me, my grandma gave it to me, it was given to her 50 plus years ago for a wedding gift.  I added the green plate behind it so it would stand out better. Oh and that book it is sitting on is from my husband's grandfather. Going through those old family heirlooms is a cheap and unique way to decorate your home and make it your own.
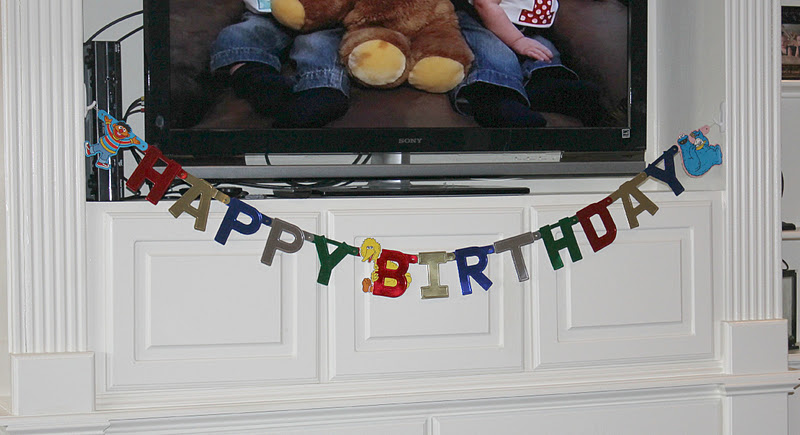
I had a bunch of spring scrapbook paper leftover from last year so that is what I used to make this banner. I just wish I would have made the letters a little bigger. 

This is quote by Lady Bird Johnson that I found that I think describes Spring, a season full of hope and new beginnings. 
Using vinyl cut by my Silhouette, I applied it to a old frame I had in my stash. 
I already had that blue mason jar and the hydrangea stem was part of some flowers I had for my wedding.
You might remember my bunny plaque from last year.
I made these yarn eggs. I did them a little different then that site though. I used multi-colored yarn and instead of cutting small pieces, I did one long piece and hung them to dry with a clothespin on a wire hanger.


Here it is all together. I never can get a good picture of this room, it doesn't get much natural light.

My other tips for decorating for holidays on the cheap are to get vases, frames, and plates in a couple colors that can be used for several holidays and interchange them.

For example, Red , Aqua, and Green are my favortie colors to use.

Red can be used for Valentine's Day, Memorial Day, 4th of July, Fall, and Christmas.

Aqua can be used for Winter, Easter and Summer.

Green can be used for St. Patty's Day, Spring, and Christmas.


The fabulous parties I am linking up to:
Lil Luna
Organize and Decorate Everything
Crystal and Co.
House of Hepworths
Delightful Order
Gluesticks
Tatertots and Jello
Be Different Act Normal
I Heart Naptime
Tip Junkie
A Bowl Full of Lemons
Let Birds Fly
Somewhat Simple
Fingerprints on the Fridge
Tidy Mom
320 Sycamore
Six Sister's Stuff
Lolly Jane
The NY Melrose Family
Creatively Living
Cowgirl Up
Oopsey Daisy


Pin It

Monday, January 23, 2012

Play Room: Art

When we decided that this room would be the play room, I really wanted to paint the room to brighten it up. After the big paint spill of 2011(when I spilt half a gallon of paint all over the nursery carpet) that I caused at our old house, my husband forbid me to paint another room again :)
So I knew that I would have to put up some bright and cheery artwork to brighten up the dark walls. I searched etsy for a couple weeks and I wasn't finding anything that I wanted for the price I wanted so I decided  we (me and the boys) would make all the art and add in a couple pictures of them.


From left to right, top to bottom:
- Picture of Grant during his first birthday photo shoot.
- Shoot For The Stars. I chose this quote because I hope they always remember to dream big and learn to never settle for less.  I used a piece of red and white chevron paper for the background and using my Silhouette I applied the vinyl design on the glass.
- I painted this letter G, that I got from Hobby Lobby, apple green. Everyone thinks I need two since I have two kids that start with the letter G but I like the way it looks with just one.
- For the three vehicles I did the same thing as I did with the "Shoot For The Stars" art, I used different color background paper and then applied the different color vinyl to the glass.
-Gabe at his first birthday photo shoot.
- The next two pieces are the little ones first masterpieces. We made them using the mess- free fingerpainting technique that I showed you last fall. I am framing these because you never know they might be worth millions one day ;)

I am by no means done decorating their  play room, so I will be sharing more as I finish it. Although nothing in my house ever seems to be "finished", every room is always subject to change.

You can find more about their playroom here:


The fabulous parties I am linking up to:
Lil Luna
Organize and Decorate Everything
Crystal and Co.
House of Hepworths
Delightful Order
Gluesticks
Tatertots and Jello
Be Different Act Normal
I Heart Naptime
Tip Junkie
A Bowl Full of Lemons
Let Birds Fly
Somewhat Simple
Fingerprints on the Fridge
Tidy Mom
320 Sycamore
Oopsey Daisy
Six Sisters Stuff


Pin It

Wednesday, January 11, 2012

Sesame Street Party: The Decor

On Monday, I posted about the food at the party. Today we will focus on the decorations that I spent many late nights and months putting together. Of course I probably could have spent many MORE months planning and added more decorations but there is only so much time. Oh well onto the next party I am planning ;)


I got the idea for these balloon wreaths at How Does She. I think mine must be fuller than hers because I used WAY more balloons than she did. I made at least two extra trips to Walmart because I thought I had enough but turns out I didn't. This was a super easy project but it was pretty time consuming. I guess mainly because I had to do two....story of my life ;) I justified the time it took because I know that I can use them in the future.
The wreaths look really small in this picture but they are really average size, my doors are huge.

To make it more personal for my boys, I made these Sesame Street signs with their names on it. How perfect that I have two doors right?
I made the sign using my Silhouette. I just cut a green and yellow rectangle, a green and yellow circle and glued the circle behind the rectangle where only half was showing. I used the Arial font for the letters and number. Real scientific right?

I also made these Sesame Street characters using my Silhouette to hang on my pot rack. I used the scalloped circle to make the faces and different shapes( circles and ovals) to make the eyes and mouths.
I  like to use my hanging pot rack for anything but it's original purpose of hanging pots.

I made the banner also. I cut the circle and letters on my Silhouette and attached together with ribbon.


This next banner is the only party decoration that I didn't make but it is pretty special too. It was the banner from my 3rd birthday party. Yes my mom really kept it all this time and no she is not some crazy hoarder ;)
The boys got ahold of this banner one day and I was chasing after them saying "Noo you can't play with that it is vintage"...true story :)


I made these for centerpieces for the island. The lollipops were favors for the kids. I made the characters the same way I made the one that were hanging.
I am sure all the parents loved me for the lollipops ;)


To see more about our Sesame Street Party, visit these links:


Don't forget to go enter the My Memories Digital Scrapbooking Software Giveaway. It ends Janurary 14th.

The fabulous parties I am linking up to:
Lil Luna
Organize and Decorate Everything
Crystal and Co.
House of Hepworths
Delightful Order
Gluesticks
Tatertots and Jello
Be Different Act Normal
I Heart Naptime
Tip Junkie
A Bowl Full of Lemons
Let Birds Fly
Somewhat Simple
Fingerprints on the Fridge
Tidy Mom
320 Sycamore
Oopsey Daisy
Six Sisters Stuff

Pin It

Tuesday, November 1, 2011

Totally Organized Tuesdays: Junk Closet Edition

If you have been reading my blog  for awhile now you probably remember my Junk Cabinet from my old house. Well apparently having a whole cabinet full of junk wasn't enough so we now have a junk closet.

There is a reason there isn't anything on the bottom shelf and the bottom two rows of the over the door shoe organizer. That reason would be these little guys. By the way, if you are building a house and have kids....get round door knobs not the oval ones. The child locks don't work on them....just saying ;)
I needed a spot to put all the little stuff that doesn't have a home so I grabbed this over the door shoe organizer at Target ( who says it has to be for shoes?). For example, the boy's craft supplies, scissors, tape, glue, label maker, screw drivers, and hammers. I also added diapers and wipes so when I buckle the kids in the car and forget I don't have any diapers, I won't have to go upstairs to get them.
So we would know what is in each pocket and where to put it back I labeled each pocket. I took clear name badge holders cut scrapbook paper to fit in it and attached it using a clothespin. To make it easy to change up the labels as our needs change, I wrote on the name badge instead of the paper so it can be wiped off.

The baskets on the shelves haven't changed  since the junk cabinet at my old house. I have a basket that holds camera accessories, phone accessories, batteries, light bulbs, card. games, and scentsy stuff.

I love that this closet is full of JUNK but looks anything but JUNKY. I think I am going to take the same concept and work on my craft closet because it is JUNKY!

The fabulous parties I am linking up to:
Lil Luna
Organize and Decorate Everything
Crystal and Co.
House of Hepworths
Delightful Order
Gluesticks
Tatertots and Jello
Be Different Act Normal
I Heart Naptime
Tip Junkie
A Bowl Full of Lemons
Let Birds Fly
Somewhat Simple
Fingerprints on the Fridge
Tidy Mom
320 Sycamore
Spring Into Organization Link Party

Pin It

Friday, October 21, 2011

Trick or Treat Buckets

I didn't like any of the trick or treat buckets I had seen in the stores so I decided to make some. Honestly though I doubt we will be doing much trick or treating though because the boys eat candy yet and we sure don't need it but there is always next year, right?!?!

(FRONT) 
(BACK)

I am sure if you have been a follower of my blog for awhile I am sure you can guess that I cut the vinyl for the letters and the bat and spider using my Silhouette.

I found the orange plastic buckets at Hobby Lobby for 4.99 and I already had the vinyl and ribbon so this was a very cheap project.

While taking these pictures I realized I never showed you what I have on top of that shelf that the buckets are hanging on.

I got the print in the middle from eighteen25 and the pictures are of my boys last year at the pumpkin patch and in their halloween costumes as Mario and Luigi. I plan on swapping out these photos for each holiday.


The fabulous parties I am linking up to:
Lil Luna
Organize and Decorate Everything
Crystal and Co.
House of Hepworths
Delightful Order
Gluesticks
Tatertots and Jello
Be Different Act Normal
I Heart Naptime
Tip Junkie
A Bowl Full of Lemons
Let Birds Fly
Somewhat Simple
Fingerprints on the Fridge
Tidy Mom
320 Sycamore
Six Sisters' Stuff
DIY Home Sweet Home Project

Pin It

Tuesday, October 4, 2011

No Shoes

We are a no shoe household and what I mean by that is if you live in our house you take off your shoes before you come in the house. So I by no means expect a guest in my home to take off their shoes (unless they have been playing in the mud). I am mainly just trying to cut down on the dirt that comes in our home by us not wearing shoes.

For the boys, the shoes they wear the most stay in the car or diaper bag so  we take their shoes off before we get them out of the carseat and usually don't put them on until we get to destination because we will have to put them on again anyways. So we do it for them so they don't need a reminder and hopefully it will just become a habit for them when they get older. I don't need a reminder because mopping as often as I do is reminder enough. My husband is a different story, as soon as he opens the door I am saying "take your shoes off". So I felt he needed a sign to remind him so I made this sign for the entrance to our home from the garage.
I had all the stuff that I need for this project on hand.

Supplies:
wooden plaque from Hobby Lobby
spraypaint- I used Black Satin finish
vinyl cut by my Silhouette for the letters
photo of my sweet boys feet at 2 months old
photo corners that I had from my scrapbooking days
Mod Podge
picture hanger
ribbon
3m hook(you can obviously use a nail though I just didn't want to put a hole in my door)

-Spraypaint the wooden plaque.
- Apply the vinyl lettering.
- Mod Podge the picture on to the board.
- Stick in the picture hanger to the back and tie on ribbon.
- Hang on the door.

Easy right?

Want to see some other creative sayings to remind your family to remove their shoes?
Tip Junkie did a post on the subject.

Some of my favorites were:
If you're not God or George Strait, take off your boots.
Life is full of choice, take off your shoes or scrub the floor.
Please remove your shoes and don't take better ones on the way out.

The fabulous parties I am linking up to:
Lil Luna
Organize and Decorate Everything
Crystal and Co.
House of Hepworths
Delightful Order
Gluesticks
Tatertots and Jello
Be Different Act Normal
I Heart Naptime
Tip Junkie
A Bowl Full of Lemons
Let Birds Fly
Somewhat Simple
Fingerprints on the Fridge
Tidy Mom
320 Sycamore

Pin It

Tuesday, September 27, 2011

Totally Organized Tuesday: Pantry Chalkboard

Out of all the projects I have done so far in my new house, this is probably my favorite. Granted we have only been here a little over a month so I am sure there will be many more favorites to come. It all started with me wanting a convenient place for me to store my grocery list. I first though I would hang a clipboard on the door but then I got the idea to paint chalkboard paint on the doors. Problem was...I didn't want it to be permanent in case I didn't like it. Then I saw a blog post where someone was using chalkboard contact  paper on their walls and BINGO that was just what I needed. It is easy to apply and if I get tired of it(which I don't think I ever will) I can easily remove it with no harm done to the doors.

Here is the finished product. All I needed to apply the chalkboard contact paper is a exacto knife to make it fit in the panels, a credit card to smooth out the lumps, and chalk to "cure" the chalkboard so that chalk will adhere to it better.  To cure the chalkboard, you take the side of a piece of chalk and color the whole chalkboard then erase and your writing will show up better. Easy Peasy! I cut the letters with my Silhouette but those could have easily been written with chalk also.

On the left side I put my menu for the week. This is mainly for me, so I remember what I bought the groceries to make.  On the bottom I put one of my favorite quotes "I can do ANYTHING but I can't do EVERYTHING."

On the right side I have my grocery list. I really only needed to do two panels one for the menu and one for my grocery list but when my boys are old enough to not dump all the cheerios out everytime the pantry is opened draw I will let them use the two bottom chalkboards.
If you have been following my blog for  awhile you probably recognize these bins from my pantry at my old house.
I made the labels with the help of my silhouette, some scrapbook paper and ribbon.

Hope this gives you some inspiration to get your pantry organized. It will make grocery shopping and meal planning a little easier because you can easily see what you have and what you need. No more wasting money on things you already have.


Links to the fabulous parties I am linking up to:
Lil Luna
Organize and Decorate Everything
Crystal and Co.
House of Hepworths
Delightful Order
Gluesticks
Tatertots and Jello
Be Different Act Normal
I Heart Naptime
Tip Junkie
A Bowl Full of Lemons
Let Birds Fly
Somewhat Simple
Fingerprints on the Fridge
Tidy Mom
Spring Into Organization Link Party
Pin It

Monday, July 25, 2011

Gift Idea for Wedding

I made this plaque for a wedding gift for Kevin's Aunt Susie who got married back in March.

It was super easy to do. You only need a few supplies and of course some kinda a digital cutter (silhouette or cricut).
I didn't take pictures for a tutorial because it is pretty self explanatory. I used the font "Copperplate Gothic Bold" for the last name and "Lucida Handwriting" for the date.


It was used at the gift table at the wedding.


Tip Junkie handmade projects


Sunday, July 24, 2011

Gift Idea for Baby Shower

I packed up my Silhouette and all my crafting supplies about 2 months ago and I am having crafting withdrawls without it. So I thought I would show you some projects that I did awhile back and never shared with you.

If you need a gift for a baby shower, this is a easy and cute gift idea. I have recently decided to try and stay away from gift bags and wrapping paper and be more creative with my gift giving. You can buy a cute basket or bin for the same price as a gift bag these days and it can be repurposed instead of thrown away. I got this cute little basket from the Better Homes and Garden line at Target. It can be personalized with the baby's name or nursery theme. I also decorated the wipes case. And what new momma doesn't like their baby's name on everything?


Stay tuned tomorrow for a gift idea for the next wedding you are invited to!

Tip Junkie handmade projects